1. Prerequisites:
1. Go to Subscriptions -> Resource Providers. Search for 'Recovery.' For Microsoft.RecoveryServices, click on the three horizontal dots and select 'Register.' It will then show as registered if not already registered.

2. Major Considerations:
1. The Recovery Service Vault, Azure Storage Account, Host pool Session hosts should all be in the same region.
2. If you wish to enable a Private Endpoint for Azure Backup, make sure to enable it during the Recovery Services Vault configuration. If the Recovery Services Vault is already created and has files it is protecting or is already registered, enabling the Private Endpoint afterward will not work.
3. You can't create private endpoints with static IPs like you can for AVD and Storage Accounts.
4. If you're creating the private endpoint as the owner of the Recovery Services vault, the private endpoint you created is auto-approved. Otherwise, the owner of the vault must approve the private endpoint before using it.
5. When the Immutable Vault is enabled for Azure Backup, you cannot decrease the retention days, but you can increase them. For example, you cannot reduce the retention period from 2 days to 1 day, but you can extend it from 2 days to 3 days.

3. Best Practices:
1. Enable the Immutable vault for Azure Backup. Immutable vault for Azure Backup is a special kind of storage container where your backup data is kept. Once you set it up, you can’t modify or delete the backup data for a certain period of time. This protects your backups from being accidentally deleted or altered, and also from being affected by ransomware attacks.

2. For Redundancy option, select Geo-redundant. This will be important when the Customer would have Disaster Recovery requirement. GRS replicates your data to a secondary region for higher durability and availability. Select this if the Customer can tolerate the higher cost. If the backup data is not that critical, you can go with Zone-Redundant or Locally-redundant depending on the requirement.

3. Encryption type, select Microsoft-managed keys as they are suitable and offer convenience with minimal management overhead. However, if you need advanced control and compliance requirements, customer-managed keys are the better choice. Microsoft manages the appropriate rotation of Microsoft-managed keys per compliance requirements. If it is Customer Managed key, customer has to manage the rotations.

4. Create a dedicated subnet in the Hub Vnet for the private endpoints. A private endpoint for a vault uses 10 private IP addresses, and the count may increase over time. Ensure the subnet has enough IPs available for scalability.
5. Enable Lock on the Storage Account. The current Azure Files backup solution keeps snapshots in the same storage account as the backed-up file share. If the storage account gets deleted, you'll lose all your snapshots. To protect your account against accidental deletion, Azure Backup takes a Delete lock on the storage account.

6. Hourly backups are ideal for critical or frequently changing data, while Daily backups might suffice for less critical data.

4. Creating Recovery Services Vault:
1.The Recovery Services vault is an interface in the Azure Portal that helps you manage backup-related activities. In the Global Search, search for Recovery Services Vault in the search bar. Select + Create.

2. In the Basics tab, select the Subscription and resource group.
Give a name for the instance.
Select the Region.
Click Next: Redundancy
Note: Cross-Subscription Restore in Azure Backup is a feature that allows you to restore backup data to a different Azure subscription than the one where the backup was originally taken.

3. In the Redundancy tab, select Geo-redundant for Backup Storage Redundancy and Enable for Cross Region Restore. Click Next: Encryption.


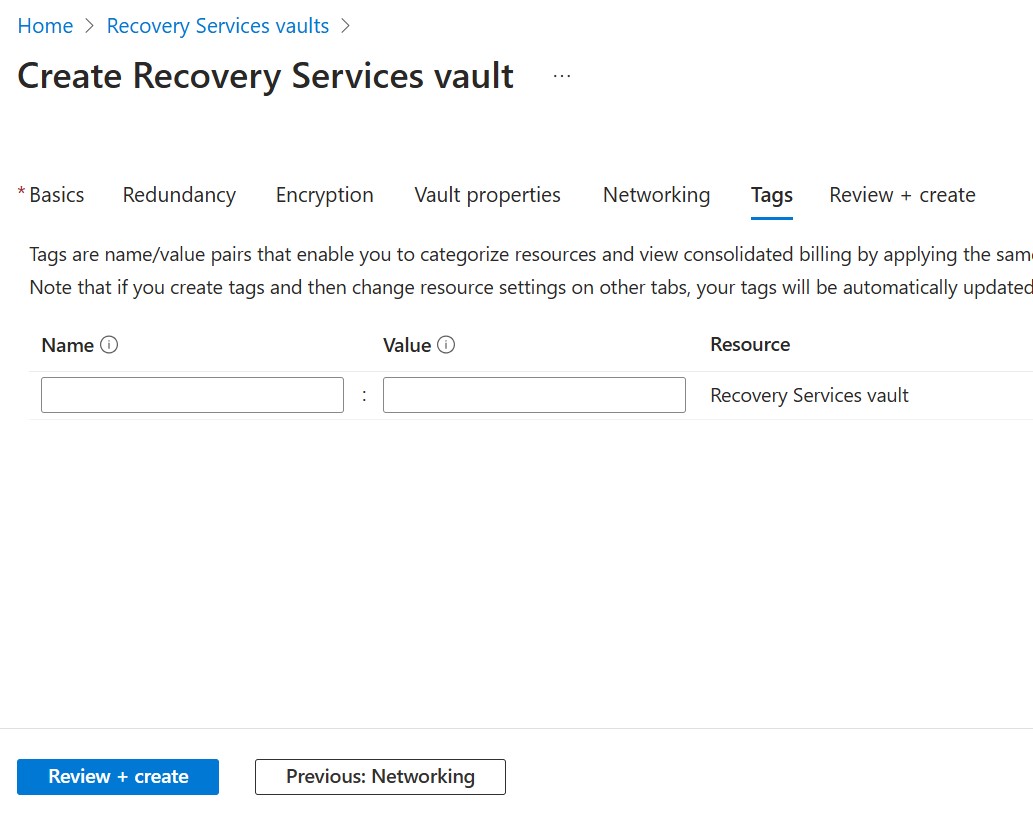
5. In the Vault Properties tab, check the box for Enable Immutability. Click Next.

6. In the Networking tab, for connectivity method select Deny public access and allow private access. Click on +Add.

7. The Subscription, Resource Group, Location, target sub-resource is selected by default. Change it if required.
Give a name for the Private Endpoint.
Select the Virtual Network and the Subnet.

Say Yes to Integrate with Private DNS Zone. Click on Okay.

9. Click on Review +Create.
10. Create.
5. Configure the Backup for Azure File Share:
1. Go to the Recovery Service Vault that is created, click on +Backup.

2. Select Azure File Share in the drop down.
Click on Backup.

3. For Storage Account, click on Select. If for the first time you are not able to view the Storage Account, click on Cancel and again click on Select. The Storage account would be visible provided both are in the same region.
Check Enable Lock on the Storage Account.
Click on OK.

4. Click on Add.

5. Select the Share that pops up. Click OK.


7. Give the Policy Name.
Select Snapshot as Backup tier.
Select the Backup schedule as per Customer Requirement.
Number of days for Retention should also be selected based on Customer Requirement.
Click on OK.

8. Click on Enable Backup.
6. Run an on-demand backup job to test the backup:
1. Go to the Recovery Services Vault, Under Protected Items click on Backup Items.

2.Click on Azure Storage (Azure File)


4. Click on Backup now.

5. Give a Date. Click on OK.

6. Once the Backup is triggered and completed, you can see the snapshot with the date and time in the Recovery Points.

7. Restore Scenarios:
Scenario 1. When a user logs into AVD, the VHD file that stores the user profile is attached to the session host using FSLogix. For some reason, the entire VHD file containing the user's files and folders is accidentally deleted, the user will need it restored.
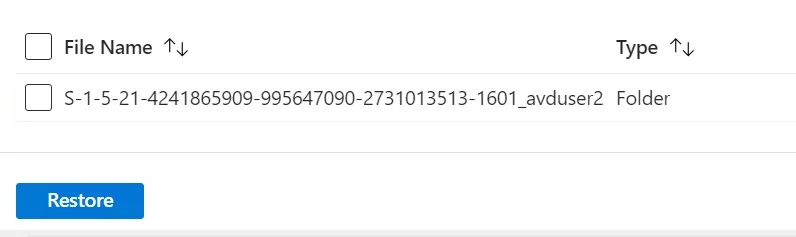
In the Image shown below, the highlighted directory of avduser2 is deleted that contained his VHD File.


Solution:
1. Go to the Recovery Services Vault, Under Protected Items click on Backup Items.
Click on Azure Storage (Azure File).
Click on View Details.
Click on File Recovery.

OR
Select the date when the user said the files have been deleted.


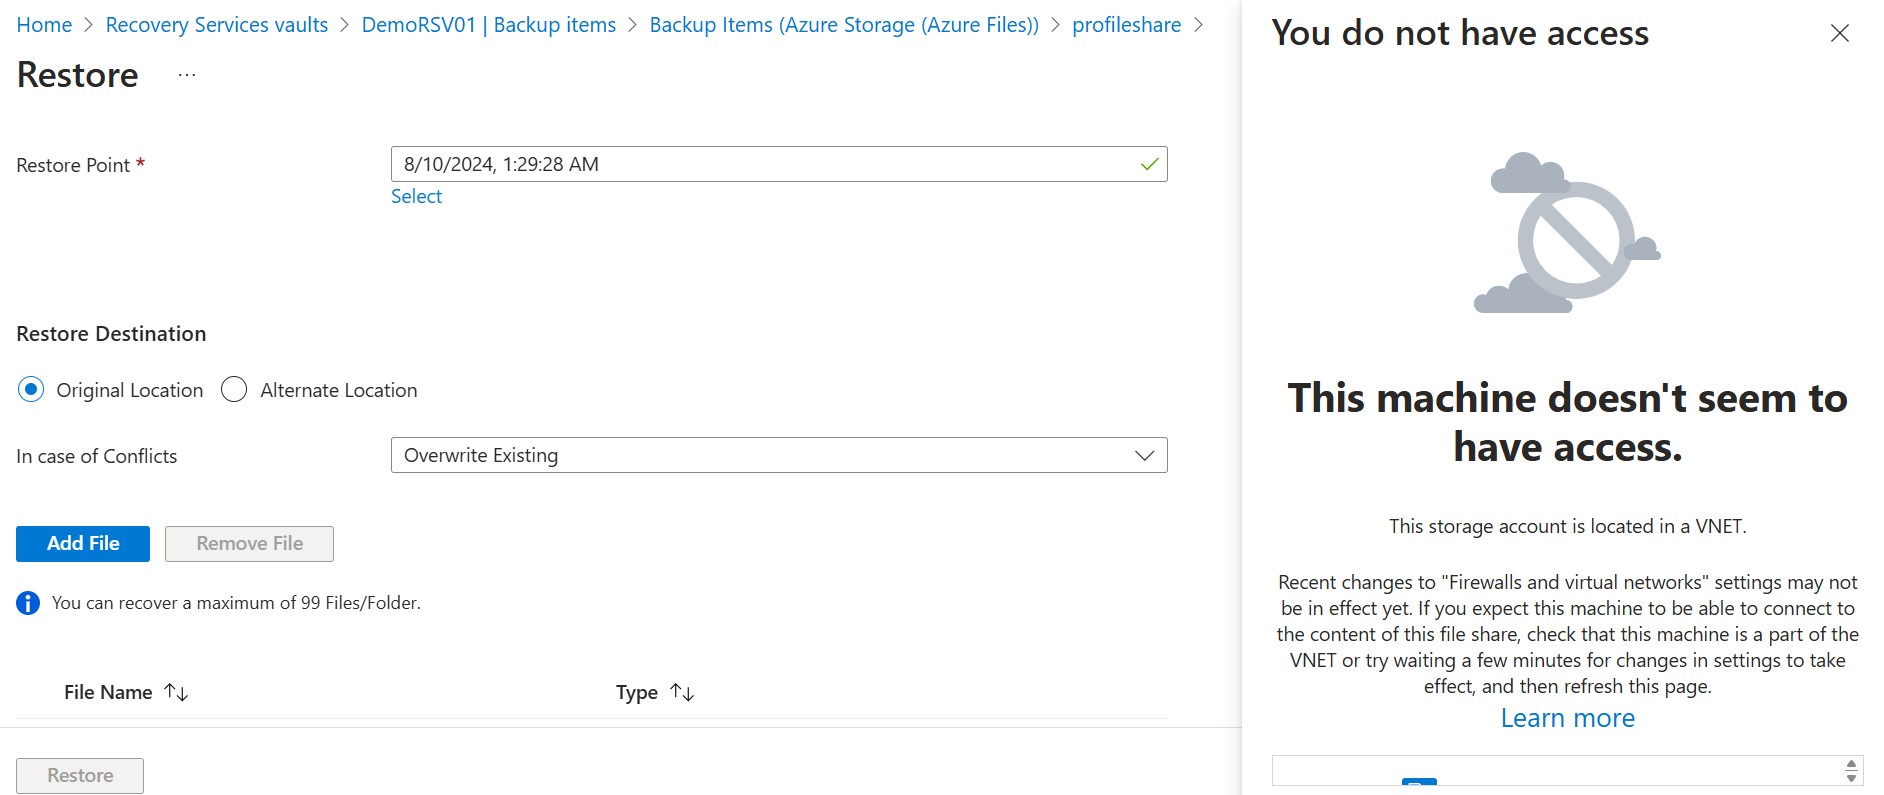
3. In the Restore Destination, check Original Location.
In Case of Conflicts select Overwrite Existing.
Click on Add File

4. I get the access error because I have opened the Azure Portal from the Public Internet and Private Endpoint is configured for the Storage Account. It can be only accessed from within the Private network.
5. Check the Box next to the directory of avduser2.
Click on Select.

6. Click on Restore.

7. The notification bar show the status:


8. Once the Restore is successful, ask the avduser2 to login and he should now see all his files and folders that were deleted because the VHD file is restored.
Scenario 2: avduser2 says he accidentally deleted folder named "Important Folder-Part 1"

Worst-case scenario, the folder is also deleted from the Recycle Bin, and the user now wants only this particular folder to be restored.

Solution:
1. Go to the Recovery Services Vault, Under Protected Items click on Backup Items.
Click on Azure Storage (Azure File).
Click on View Details.
Click on File Recovery.
2. Click on Select. Select the recent Snapshot and click on OK.
OR
Select the date when the user said the files have been deleted.
3. **Important and different Step from Scenario 1**
In the Restore Destination, check Alternate Location.
The Target Subscription, Storage Account is auto-populated.
Select the File Share.
In Case of Conflicts select Overwrite Existing.
Click on Add File

4. Check the Box next to the directory of avduser2.
Click on Select.
5. Click on Restore.
6. Once the Restore is successful, go to the restore path mentioned in Step 3:

7. Click on the Restore Folder. You would see the avduser2 folder inside it.

8. Click on avduser2 folder, you would see the VHD file in it.
Click on 3 vertical dots and click on Download.

9. The VHD file gets downloaded.

10. **It is assumed that as an admin working in the customer environment, you have access to a jump server or AVD from which you can access the Azure Portal. Do not download the VHD file outside the customer environment, as it poses a security risk**
11. Go to the downloads folder, double click on the VHD file. Click on Profile Folder.

12. If double clicking the vhd file does not work and you get an error. Go to the Start Menu of your Jump Server, type diskmgmt and click on the format hard disk option. Right click on the avduser2 disk, select Change Drive letter and give it a letter and then it should be visible in the File Explorer.

13. Coming to Point 11, click on Profiles folder, click on Desktop, you would see "Important Folder- Part 1" is visible as due to the Restore Process.

14. Now, the Customer only wanted this particular folder. So copy it somewhere and you can eject the avduser2.vhd disk.
15. Now, go to the original vhd file of the avduser2 from where he had deleted the folder.

16. Click on 3 vertical dots and click on Download.
17. Double click on the VHD file. Click on Profile Folder. Click on Desktop. You would see the Part 1 folder is not there as this is the original VHD file. So, our task is to copy the "Important Folder- Part 1" we had copied in Step 14 and paste it in here in the original location.
18. Once copied eject the avduser2.vhd disk.
19. Now, delete the original VHD disk of avduser2 and upload the disk we downloaded, which contains the copied Part 1 folder.

20. This completes the restore process for a particular file or folder rather than the entire vhd file. You can ask the user to login now and he should be able to see the deleted folder.

21. Another option is, in Step 14, after retrieving and copying the deleted folder, you can send it directly to the end user via MS Teams or SharePoint, provided the folder size is manageable.
8. Delete Azure Backup completely:
1. Go to the Recovery Services Vault, click on Delete.

Step 1: Click on Go to Settings

Click on both the Disable option. Click on Save.

Step 2: Click on Go to Backup Items

1. Click on Azure Storage (Azure Files).


3. Click on Stop Backup.

4. Select the Relevant options and click on Stop backup.


5. Click on Delete backup data.

6. It throws a warning: Since this vault is immutable, delete backup data will not succeed, if there are active recovery points. Ensure that all the recovery points have expired/deleted before deleting backup data.

7. Go to the Recovery Services vault->Settings->Properties.
Click on Settings under Immutable vault.
Uncheck Enable vault immutability.
Click on Apply.


9. Now perform point 5 and 6 again.

Step 3: Go to Backup Infrastructure

1. Click on Storage Account->Click on 3 vertical dots->Unregister.

2. Type the Storage Account name, add the comments and reason. Click on Delete.

3. Step 3 and Step 4-There may be no resources. Proceed to Step 6.
Step 6: Remove Private Endpoint Connections.

1. Click on Private Access.
Click on Private Endpoint Created.


Final Step:
Check the box and click on Yes.


Comments
Post a Comment