 1. Create Hub and Spoke Vnet:

1.1 Create Hub Vnet and Azure Firewall, Virtual Network Gateway Subnets:
1. Search for Virtual Networks in the Global search and click +Create.

2. Select the appropriate Subscription and the Resource Group.
3. Give a suitable name for the Vnet.
4. Select the region.
5. Click Next.


6. Leave the defaults as they are in the Security tab; Click Next.

7. Give the IP range as per the requirement.
8. Delete the default subnet, as it is not required.
9. Click +Add a subnet.

10. In the Subnet Purpose tab, select Azure Firewall.
11. The Name tab is auto populated.
12. Select the IPv4 range from the Vnet address space.
13. Click Add.


14. Click +Add a Subnet.

15. In the Subnet Purpose tab, select Virtual Network Gateway.
16. The Name tab is auto populated.
17. Select the IPv4 range from the Vnet address space.
18. Click Add.

19. Click Next.

20. Provide the tags, if any. Click Next.

21. Click Create.
22. The deployment is complete.

1.2 Create Spoke Vnet:
1. Search for virtual network in the global search and click +Create.

2. Select the appropriate Subscription and the Resource Group.
3. Provide a name for the Vnet.
4. Select the appropriate region.
5. Click Next.

7. Click Next.

9. Under subnets, click default.

11. Select the size of the Subnet as per the requirement.
12. Leave all other options unchanged.
13. Click Save.


16. Click Create.

17. The deployment is complete.

2. Azure Firewall Creation:
2.1 Create Azure Firewall Public IP address:
1. Search for Public IP address in the global search and click +Create.

2. Select the appropriate Subscription, Resource Group and the Region.
3. Provide a suitable name.
4. Select the IP version as IPV4.
5. Select the SKU as Standard.
6. For the Availability Zone, select 1.
7. For Tier, I have selected Regional.
8. For the IP address assignment select Static.
9. For Routing preference select Microsoft network.
10. Keep the other options as default, as they are.
11. Click Next.


 12. For Protection type, I have selected Disable.
13. Click Next.
14. Provide the tags, if any.
15. Click Next. 16. Click Create.
17. The deployment is complete.
1. Search for Public IP address in the global search and click +Create.

2. Select the appropriate Subscription, Resource Group and the Region.
3. Provide a suitable name.
4. Select the IP version as IPV4.
5. Select the SKU as Standard.
6. For the Availability Zone, select 1.
7. For Tier, I have selected Regional.
8. For the IP address assignment select Static.
9. For Routing preference select Microsoft network.
10. Keep the other options as default, as they are.
11. Click Next.


13. Click Next.

14. Provide the tags, if any.
15. Click Next.


17. The deployment is complete.

2.2 Create Azure Firewall:
1. Search for Firewall in the global search and click +Create.

2. Select the appropriate Subscription, Resource Group and the Region.
3. Provide a Name for the firewall.
4. For Availability Zone, select Zone 1.
5. For Firewall SKU, select Standard.
6. For Firewall management, select 'Use a Firewall policy to manage this firewall'
7. For Firewall policy, click Add New and add a policy.
8. For 'Choose a Virtual Network', select 'Use existing'.
9. Select the existing Virtual Network and the Public IP address that was created.
10. Unselect Enable Firewall Management NIC.
11. Click Next: Tags


12. Provide the tags, if any.
13. Click Next: Review +Create. 14. Click Create.
15. The deployment is complete.
1. Search for Firewall in the global search and click +Create.

2. Select the appropriate Subscription, Resource Group and the Region.
3. Provide a Name for the firewall.
4. For Availability Zone, select Zone 1.
5. For Firewall SKU, select Standard.
6. For Firewall management, select 'Use a Firewall policy to manage this firewall'
7. For Firewall policy, click Add New and add a policy.
8. For 'Choose a Virtual Network', select 'Use existing'.
9. Select the existing Virtual Network and the Public IP address that was created.
10. Unselect Enable Firewall Management NIC.
11. Click Next: Tags


13. Click Next: Review +Create.


15. The deployment is complete.

3. Create Local Network Gateway:
1. Search for Local Network Gateway in the global search and select it. 2. Select the Subscription, Resource Group and the Region.
3. Provide a name to the local network gateway.
4. For Endpoint select IP addresses.
5. For IP addresses, provide the public routable IP address of your On-premises setup.
6. In the Address Space, mention the private IP range used by the On-premises environment.
7. Click Next: Advanced.

8. Select No.
9. Click Next.
 10. Click Create.
11. The deployment is completed.
1. Search for Local Network Gateway in the global search and select it.


4. Create Virtual Network Gateway:
4.1 Create a Virtual Network Gateway:
1. Search for Virtual Network Gateway in the global search and click +Create.

2. Select the Subscription and the Region.
3. Provide the name for the virtual network gateway.
4. For 'Gateway type', select 'VPN'
5. For 'SKU', select 'VpnGw1'
6. Generation is selected by default.
7. Select the Hub-Vnet where the Gateway subnet was created.
8. Create a new Public IP address.
9. Select Disabled for Enable active-active mode, Configure BGP and Enable key Vault Access.
10. Click Next.

 11. Provide the tags, if any.
 12. Click Create.
13. The deployment is completed.
1. Search for Virtual Network Gateway in the global search and click +Create.

2. Select the Subscription and the Region.
3. Provide the name for the virtual network gateway.
4. For 'Gateway type', select 'VPN'
5. For 'SKU', select 'VpnGw1'
6. Generation is selected by default.
7. Select the Hub-Vnet where the Gateway subnet was created.
8. Create a new Public IP address.
9. Select Disabled for Enable active-active mode, Configure BGP and Enable key Vault Access.
10. Click Next.


13. The deployment is completed.

4.2 Add Site-to-Site Connection:
1. Navigate to the Virtual network gateway created.
2. Under Settings select Connections and click +Add.

3. Select the Subscription and the Resource Group.
4. For Connection type, select, 'Site-to-site (IPSec)'
5. Provide a name for the connection.
6. Select the region.
7. Click Next: Settings 8. Select the Virtual network gateway that was created.
9. Select the Local network gateway that was created.
10. For Authentication Method, select, 'Shared Key (PSK)'
11. Provide a Shared Key of your choice.
12. Keep all other settings as default.
13. Click Next: tags
 14. Provide tags, if any.
 15. Click Create.
 16. The deployment is complete
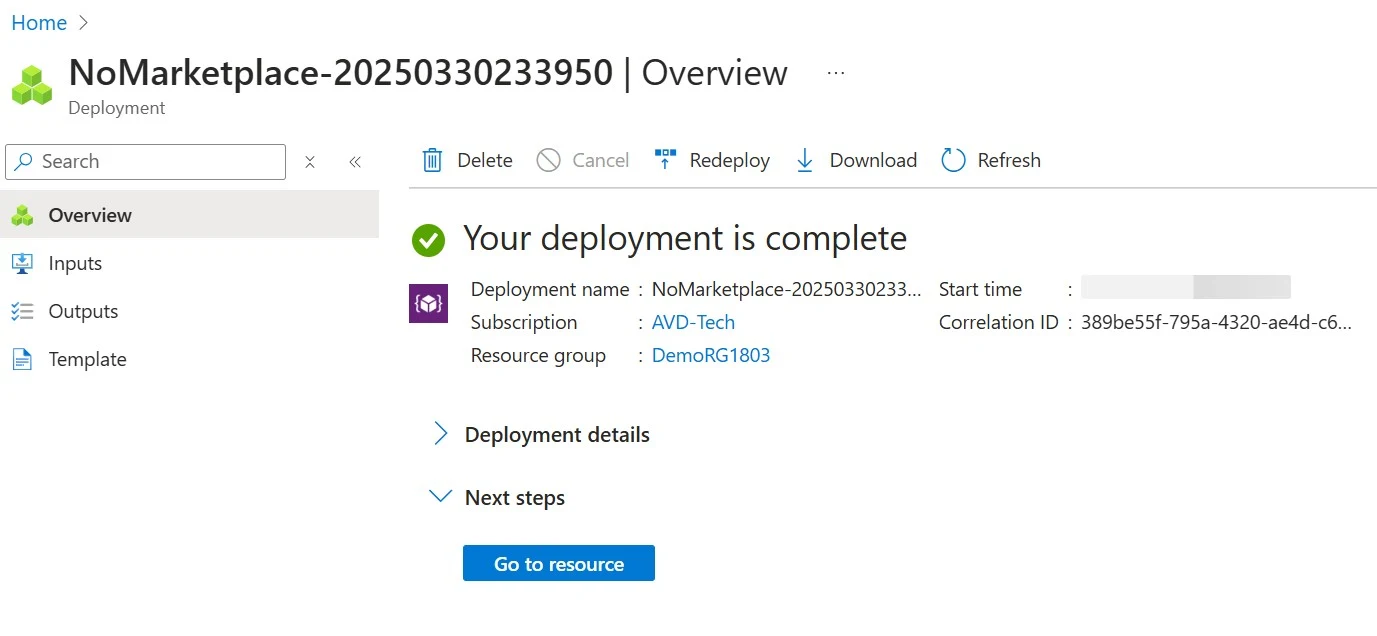
5. Create Peering between Hub and Spoke Vnet:

3. Select the Subscription and the Resource Group.


5. Create Peering between Hub and Spoke Vnet:
1. Search for the Virtual network in the global search and select the Hub Vnet.
2. Under Settings, select Peerings.
3. Click +Add.

4. Under the Remote virtual network summary tab, Provide the Peering link name: Spoke-to-Hub.
5. Select the Virtual network as Spoke-Vnet.
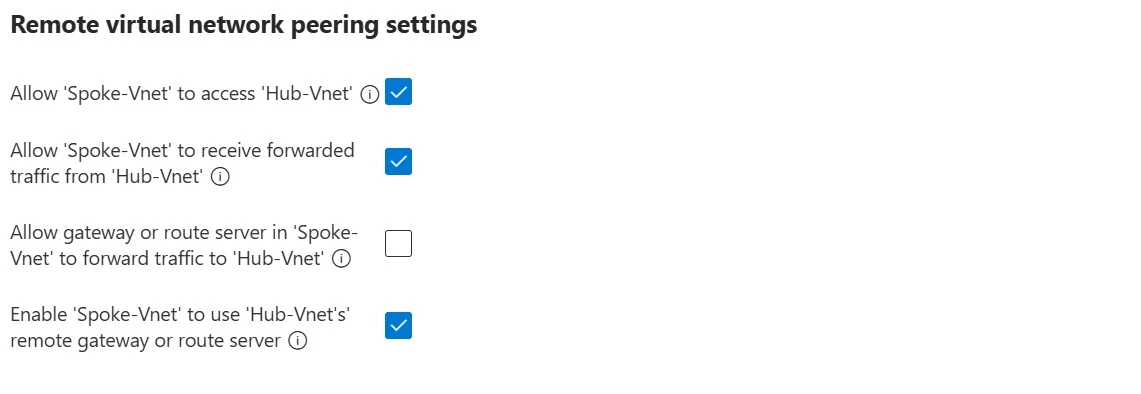
6. In the Remote Virtual Network peering settings, enable the options mentioned in the screenshot.
7. Under the Local virtual network summary tab, Provide the Peering link name: Hub-to-Spoke.
8. In the Local virtual network peering settings, enable the options mentioned in the screenshot.
9. Click Add.
 10. Peering is completed.

4. Under the Remote virtual network summary tab, Provide the Peering link name: Spoke-to-Hub.


6. Update DNS Servers in Spoke Vnet:
1.Navigate to the Spoke Vnet and under Settings click DNS Servers.
2. Add the IP addresses of the Domain Controller.
3. Click Save.

1.Navigate to the Spoke Vnet and under Settings click DNS Servers.
2. Add the IP addresses of the Domain Controller.
3. Click Save.

7. Create Route Tables:
1. Search for Route Table in the global search and click +Create.

3. Provide a meaningful name.
4. Select No to Propagate gateway routes.
5. Click Next.

6. Provide the tags, if any. Click Next.


10. Provide the route name.
11. Select IP addresses as Destination type.
12. For Destination IP address, provide 0.0.0.0/0
13. Next hop type should be Virtual Appliance.
14. Next hop address should be Private IP address of the Firewall we created.
15. Click Add.


17. Below are the two routes:

18. Under Settings, select Subnets. Click +Associate.
19. Under Virtual network select the Spoke Vnet.
20. Under Subnet select the Spoke Subnet.
21. Click OK.

8. Configure Firewall Rules:
8.1 Configure Application Rule for Internet Access:
1. Select the Firewall Policy.
2. Under Rules, select Application Rules.
3. Click +Add a rule collection.
4. Name: AVD-Internet
5. Rule collection type is auto populated.
6. Priority: 100
7. Action: Allow
8. Rule collection group is DefaultApplicationRuleCollectionGroup
Add rules:
Name: Allow-HTTP
Source type: IP Address
Source: Spoke Subnet
Protocol: http:80
Destination type: FQDN
Destination: *
Name: Allow-HTTPS
Same as above but protocol: https:443
9. Click Add.

10. AVD-Internet Rule is added successfully.
1. Select the Firewall Policy.
2. Under Rules, select Application Rules.
3. Click +Add a rule collection.

4. Name: AVD-Internet
5. Rule collection type is auto populated.
6. Priority: 100
7. Action: Allow
8. Rule collection group is DefaultApplicationRuleCollectionGroup
Add rules:
Name: Allow-HTTP
Source type: IP Address
Source: Spoke Subnet
Protocol: http:80
Destination type: FQDN
Destination: *
Name: Allow-HTTPS
Same as above but protocol: https:443
9. Click Add.


8.2 Configure Network Rule for Domain Join:
1. Select the Firewall Policy.
2. Under Rules, select Network Rules.
3. Click +Add a rule collection.

4. Name: Domain-Join
5. Rule collection type is auto populated.
6. Priority: 200
7. Action: Allow
8. Rule collection group is DefaultApplicationRuleCollectionGroup
9. Add the Rules as mentioned in the below screenshot.


9. Configure Remote Access Role:
1. Open Server Manager → Add roles and features
2. Select Role-based installation → Choose your server
3. In Server Roles, check:
☑ DirectAccess and VPN (RAS)
☑ Routing (for site-to-site VPN)
4. Complete the Wizard.
5. Click Open the Getting Started Wizard.

6. Select the third option- Deploy VPN only.

7. Right click on the server and select, 'Configure and Enable Routing and Remote Access'

8. Click Next.

9. Select Custom configuration.

10. Select, 'Demand-dial connections' and 'LAN routing'

11. Click Finish.

12. Select Start service.

13. Select Network Interfaces.
14. Right click and select New Demand-dial interface.

15. Click Next.

16. Provide an interface name. Click Next.

17. Select, 'Connect using virtual private networking (VPN)'
18. Click Next.

19. Select IKEv2.

20. Provide the Public IP address of the Virtual network gateway.

21. Select, 'Route IP packets on this interface'. Click Next.

22. Click Add.

23. Provide the address space of the Spoke Virtual Network, as that is the VNet we will use for the AVD deployment. Depending on the subnet mask mentioned in the Spoke VNet, add it here. Mine was /20, so the subnet mask is 255.255.240.0.
24. Provide a metric. I have specified 20. Click OK. Click Next.

25. Click Next.
26. Click Finish.

27. Right click on the interface we created and select Properties.

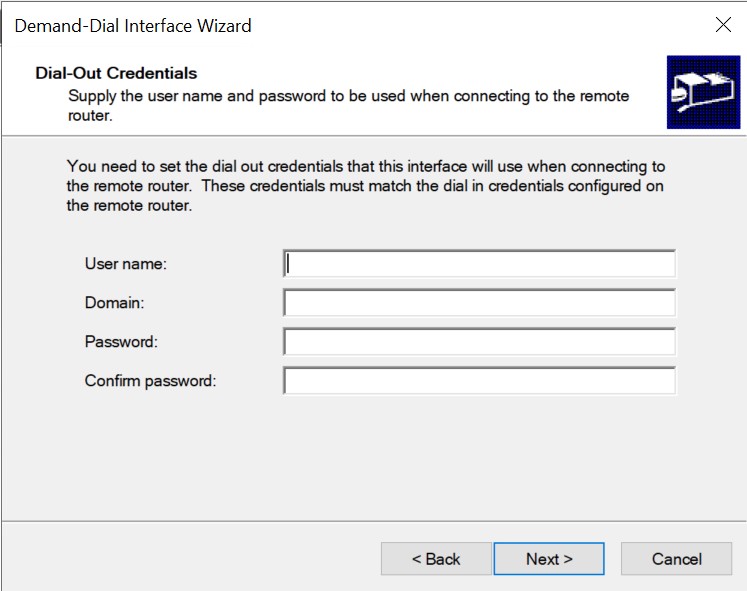
28. Navigate to the Security tab, and select, 'Use preshared key for authentication' and specify the key.
29. Click OK.

30. Again, right click and select Connect.

31. We are now connected.

Comments
Post a Comment